Archive

Setting Up Mozilla Thunderdbird

Select the ‘Tools’ menu.

Select Account Settings.

Click the Account Actions button.

Click Add Mail Account.

Enter your name as you would like it to appear on your outgoing mail messages.

Enter your E-mail address.
Enter your E-mail password.

Click the Continue button.

Thunderbird will now attempt to setup the account automatically. It will create an IMAP account and will not use SSL.

Once the automatic setup has completed click Manual Setup.

Click the “Server Settings”

Enter your full email address as the “User Name”

Click Outgoing Server (SMTP) from the left hand column.

Highlight your new SMTP Server and click Edit.

Enter your entire email address as the User Name, under the Security and Authentication section.

Change the Port from Port: 25 to Port: 26

Give this account a nickname for future reference.

Click Ok

Take a minute to review your account information.If everything appears to be fine, click Ok to finish.
You should now be able to send and receive mail.

Outlook 2011

Open the Tools menu
Click Accounts

Click E-mail Account

Enter your E-mail address

Enter the passowrd for this E-mail account.

User Name: Your email address.
Incoming server: This is typically your domain name preceded by “mail.”. This can be found in the E-mail Accounts section of the cPanel, under More > Configure Mail Client.

Outgoing Server: This is the same as the Incoming server.

Note:
You may need to check the box to
“Override default port”
and use port 26 instead of the default port 25.
Click Add Account.
How to enable SMTP Authentication
Once the account has been created you will need to enable SMTP Authentication.
Open the Tools menu
Click Accounts

Click E-mail Account

Click the “More options…” button.

From the Authenticationdrop-down menu and choose “Use Incoming Server Info”

Click the Ok button.

How to setup email on an Android based device

Create a new email account

Enter your full “Email Address”
Enter the password for your “Email Address”
Tap “Next”
Choose the type of email account you will be using.
POP3: POP3 will download the emails from the server and store them on your phone.
IMAP: IMAP will store the emails on the server and show a cached copy on your phone.
Exchange: Exchange is not supported as it requires a Microsoft Exchange server

Incoming Server Settings

Username: Please enter your full email address
Password: The password for your email address.
IMAP server: This is typically your domain name preceded by “mail.”. This can be found in the E-mail Accounts section of the cPanel, under “More” > “Configure Mail Client” .
Port:
Non Secure (No SSL): 143
Secure (SSL): 993
Note:
Using
“SSL (Accept all certificates)
will be more compatible.
IMAP path prefix: Please enter INBOX. This will allow for you to store your Sent, Drafts and Deleted emails on the server.
Tap Next.
Outgoing Server Settings

SMTP server: This is typically your domain name preceded by “mail.”. This can be found in the E-mail Accounts section of the cPanel, under “More” > “Configure Mail Client” .
Port:
Non Secure (No SSL): 25 or 26
Secure (SSL): 465
Note:
Using
“SSL (Accept all certificates)
will be more compatible.
Require sign-in Check this as you will need to authenticate with the SMTP server.
Username: Please enter your full email address
Password: The password for your email address.
Tap Next.
Account Options

Email Checking Frequency: Set how often you would like your device to check for new emails.
Note:
The more often you check your email the more drain it will cause on your battery.
Send email from thise account by default Check this option if this will be your default email address
Notify me when email arrives: Leave this checked if you would like to be notified of new email messages.
Tap Next.
Name the account

If you would like you can name the email account, this can be helpful if you have multiple accounts on the one device.
Enter the name you would like to be shown on all outgoing emails that you send from the device.
Tap Done.

Webuzo + Email + Outlook Configuration

Once you have created Email Accounts using the tutorials mentioned above, here is a stepwise guide to configure your inbox on Microsoft Outlook 2007.

Microsoft Outlook is a personal information manager from Microsoft, available as a part of the Microsoft Office suite.

Getting Started
Assumptions :
* Microsoft Outlook 2007 installed.

* Configuration Settings
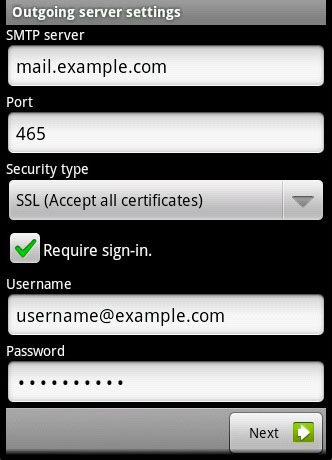
SMTP Host : example.com (Domain Name)
SMTP PORT : 587
TLS : Enabled

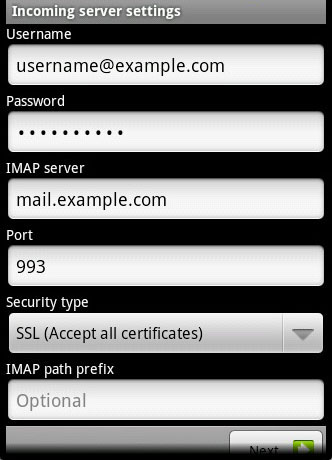
IMAP/POP3 Host : example.com (Domain Name)
POP3 PORT : 993
SSL : Enabled

* Email Account Details
Email Account : demo@example.com
Password : password

Steps
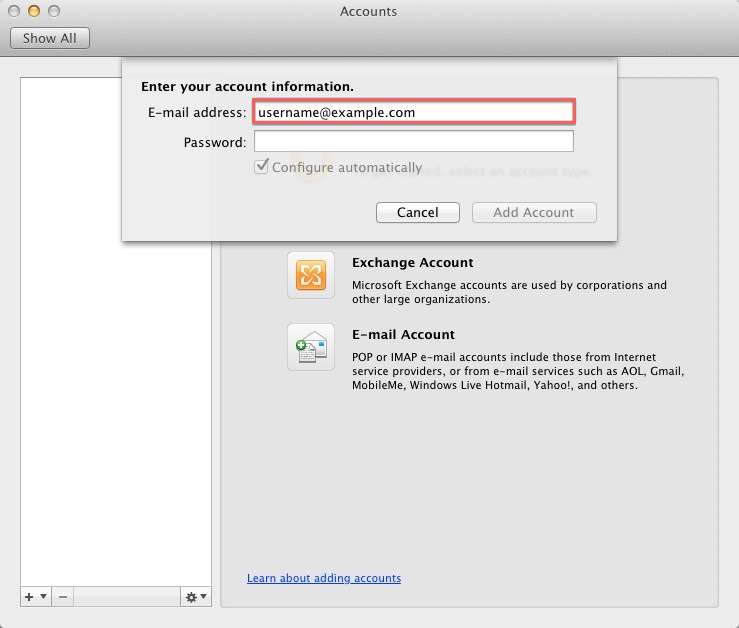
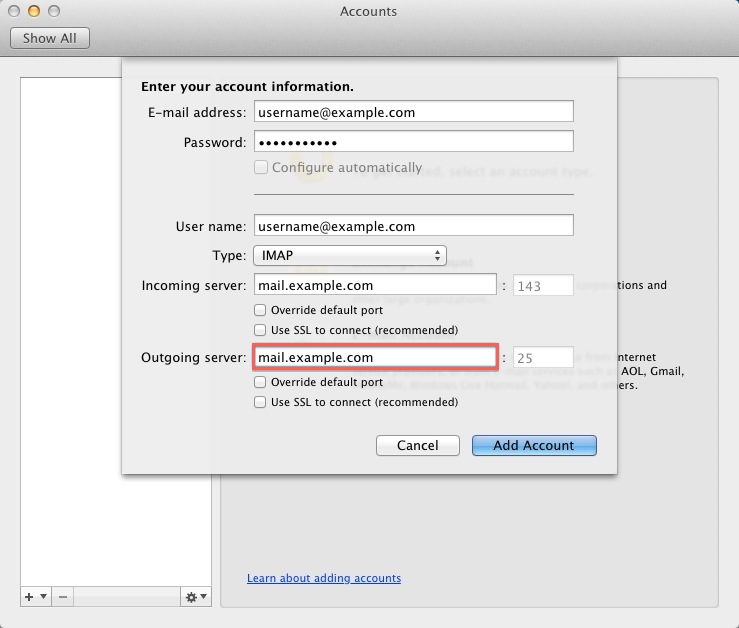
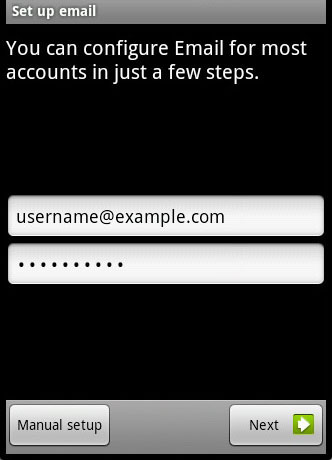
The following settings allow you to configure Outlook manually:
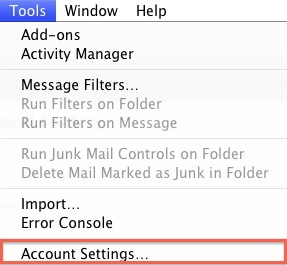
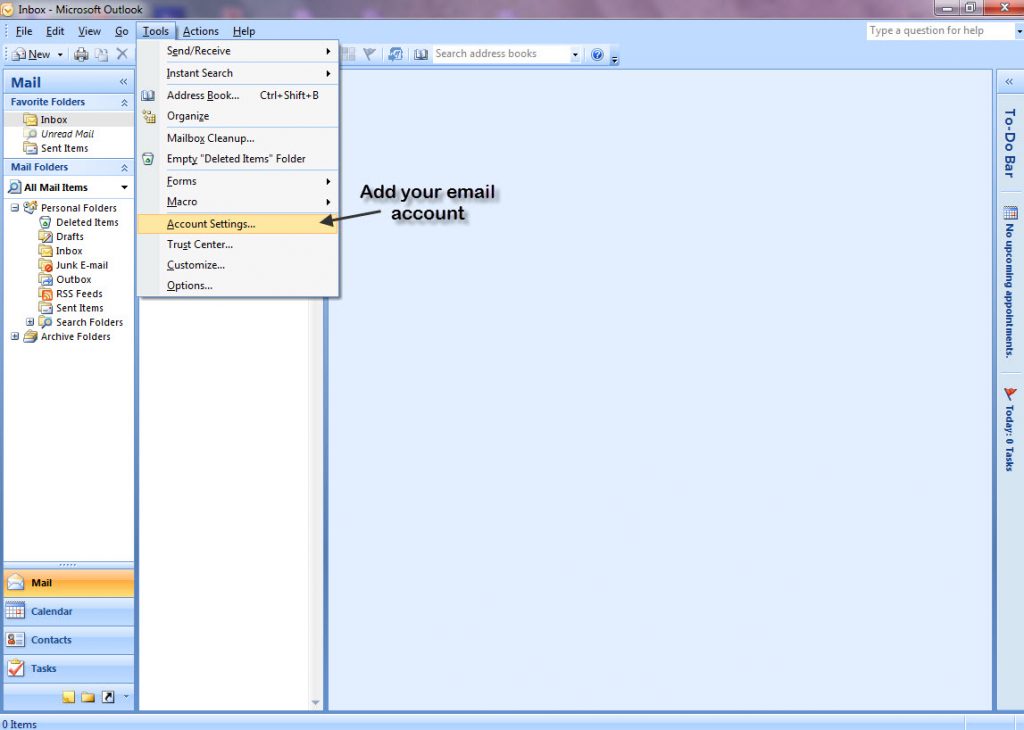
1) Click on Microsoft Outlook 2007 >> Tools >> Account Settings to Add an Email Account

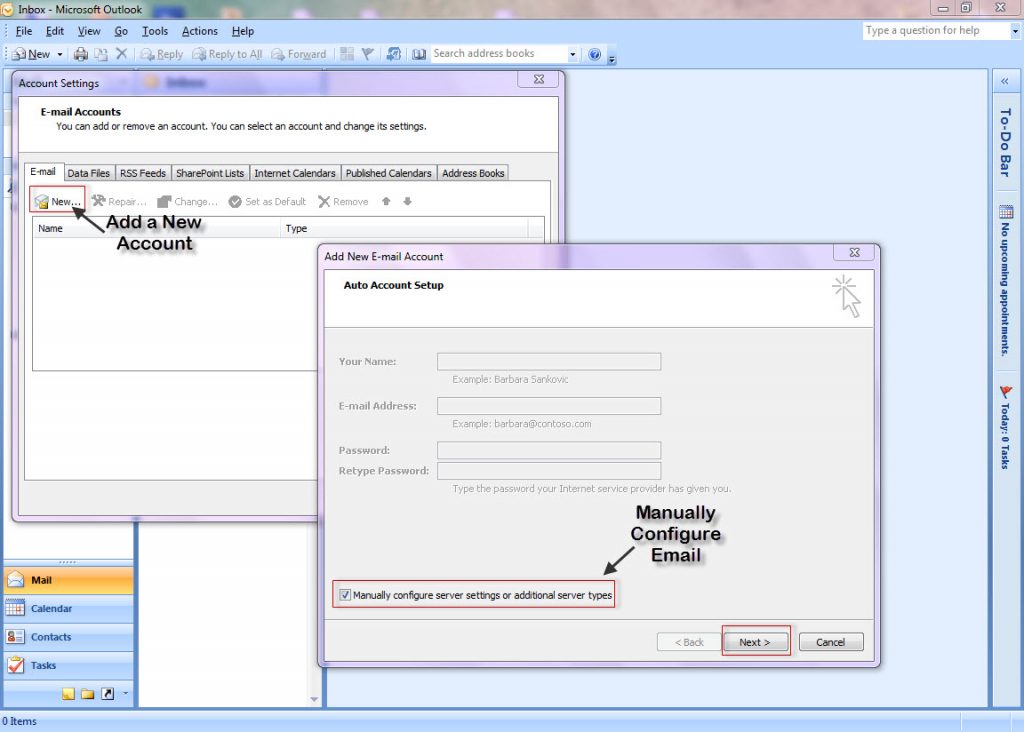
2) Click on “New” under the “Email” Tab.
Since we are to configure Outlook manually, tick the checkbox as in the following image.

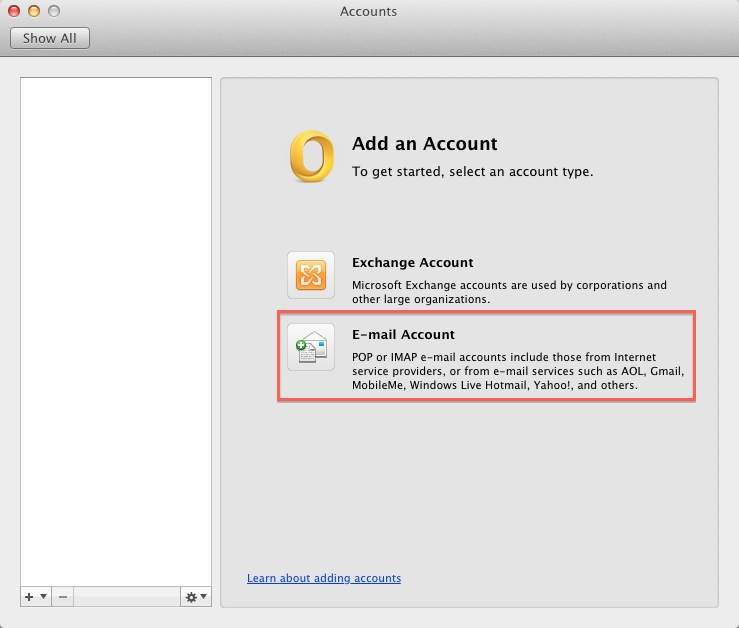
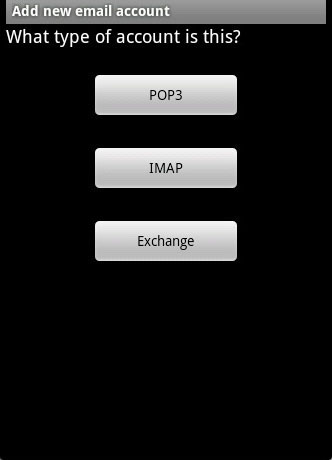
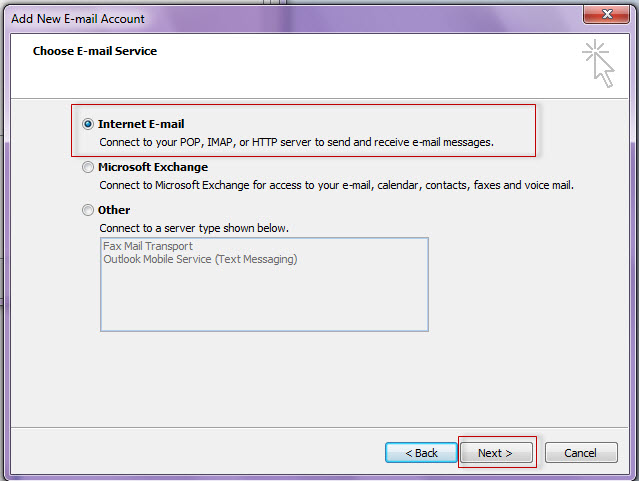
3) Click on “Internet E-mail” in the following tab and Click Next

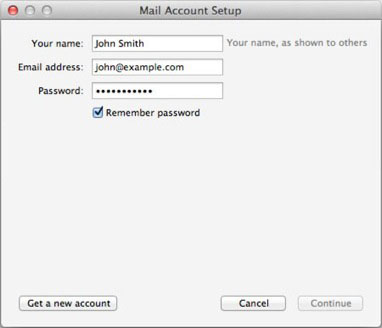
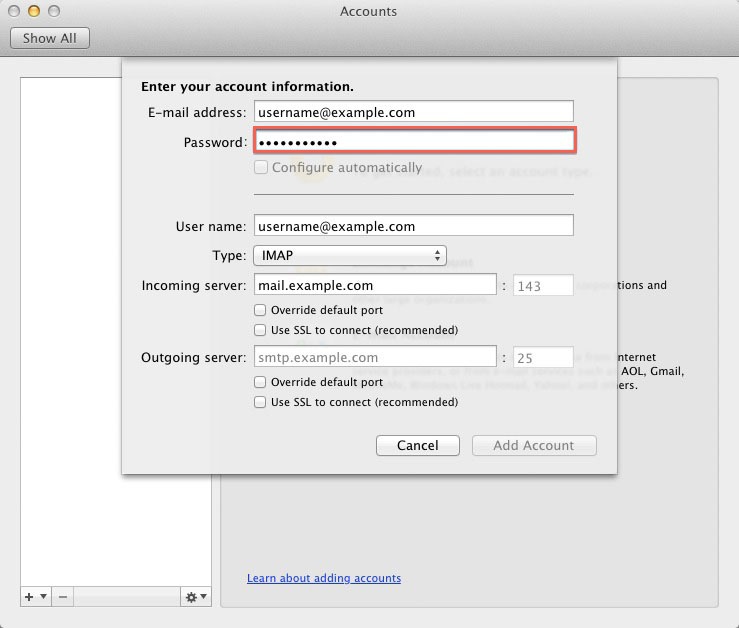
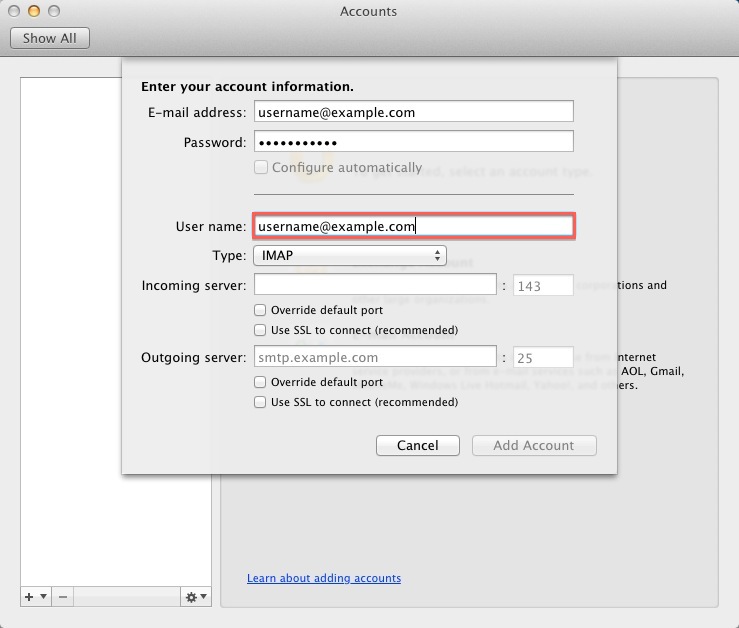
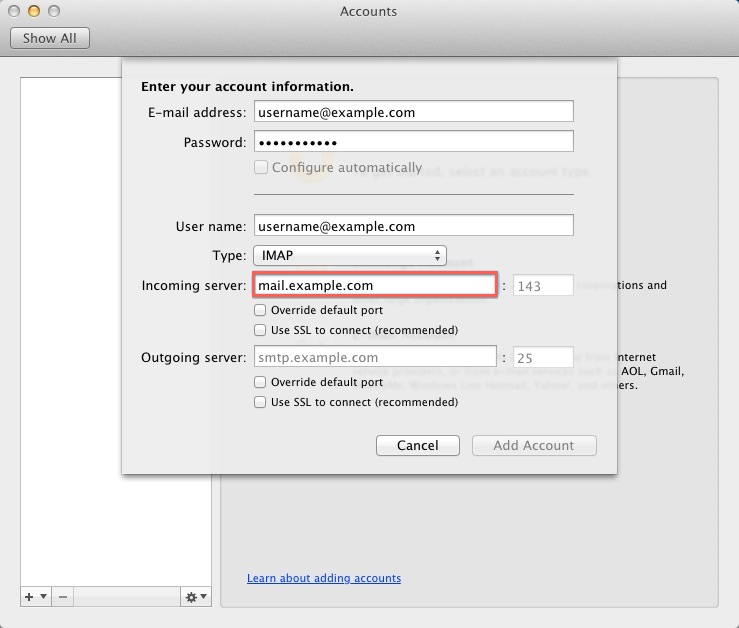
4) Fill in the details as mentioned earlier in the assumption with account type as POP3

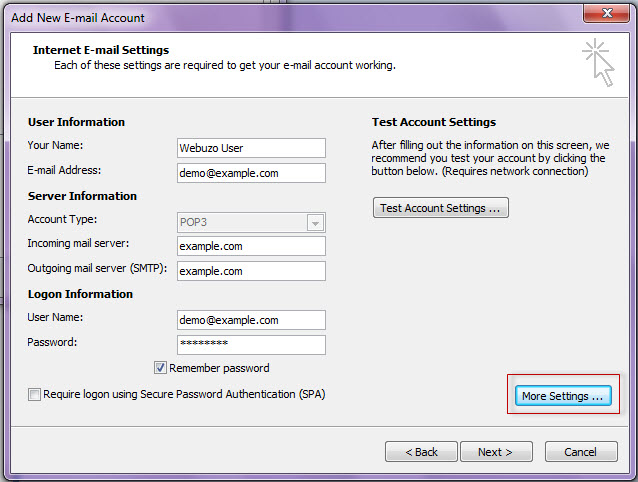
5) Click on the Advanced Tab inline for changes related to PORT and TLS as in the image below.

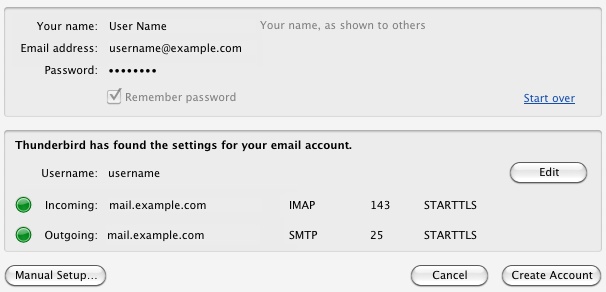
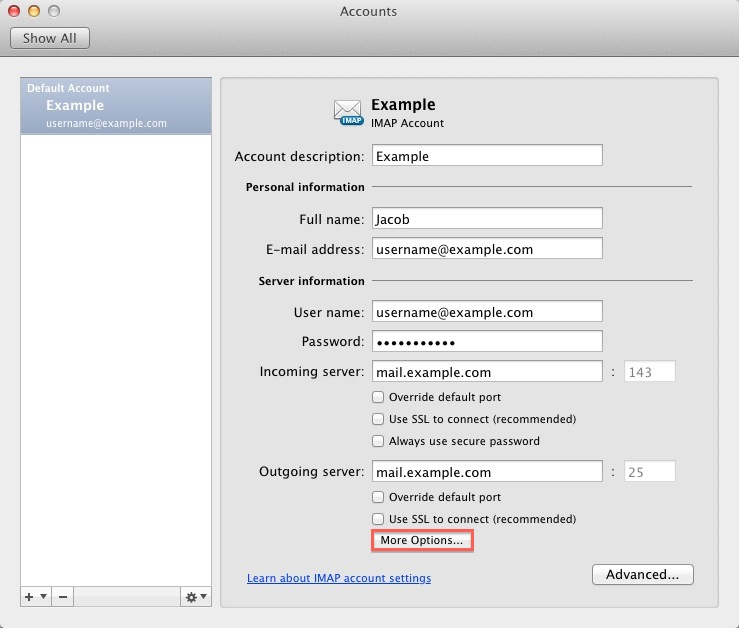
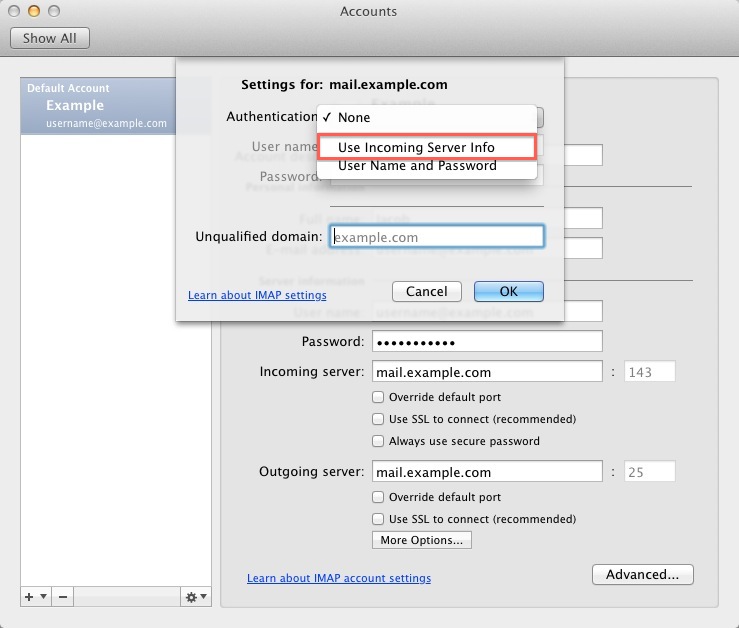
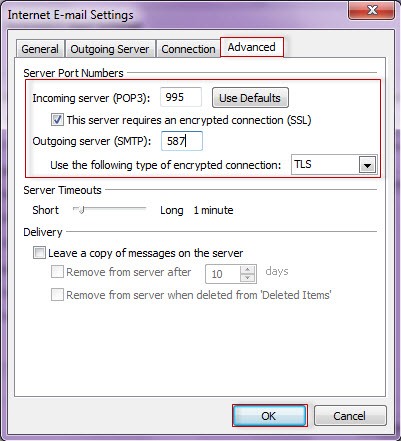
Under “More Settings > Advanced Settings” make the following changes :
Outgoing server (SMTP): 587
Use the following type of encrypted connection : TLS

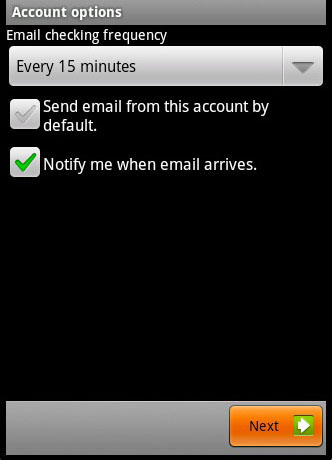
6) Click OK and Hit “Test Account Settings” to test your setup. Click Finish to complete the Setup and you are good to go.

Hope the information was enough to help you configure Webuzo Emails on Outlook.

Do you support remote MySQL connections?

Yes, remote MySQL connections are enabled.

If you are trying to connect to the MySQL server from a remote location (e.g. your computer), use your hosting account IP address as the MySQL hostname. Your server IP address can by found on the left hand column when you login to cPanel. Do not forget to add your computer IP address to the ‘cPanel’ -> ‘Remote MySQL’ section.

get ‘access denied’ errors when trying to connect to MySQL

If you cannot connect to the MySQL server, this might happen due to several reasons:
– Incorrect MySQL hostname.
The MySQL hostname on most of our servers is localhost (with the exception on few reseller servers). You can always double check this information in your Members area -> List accounts -> Account details.

– Incorrect MySQL username / password or database name.
Please navigate to cPanel -> MySQL to check this information. If you cannot remember what password is set on the MySQL user, feel free to delete it and recreate it one more time.

– You have not added the MySQL user to the database.
This is a very common issue that people forget to do. In order to have a fully operational MySQL database you must also add a MySQL user to the MySQL database and assign full permissions. You can achieve this by clicking on the ‘Add’ button under ‘cPanel’ -> ‘MySQL Databases’ -> ‘Add User To Database’ section.
If you have any other issues with the MySQL connection after taking these steps, please let us know.

What is your MySQL hostname?

The MySQL hostname on most of our servers is localhost (with the exception on few reseller servers). You can always double check this information in your Members area -> List accounts -> Account details.
If you are trying to connect to MySQL from a remote location (for example from your computer), please use these instructions:
– Use the IP address of your hosting account as your MySQL hostname. Your IP address can by found on the left hand column when you login to cPanel.
– Please add your computer IP address to the cPanel -> Remote MySQL section. You can check the computer IP address at http://www.tracemyip.org/
– Use either the MYSQL username / password that was created in cPanel -> MYSQL section, or your cPanel login details to connect to the database.