Archive

Common variations of the 554 email error

554 5.7.0 Message Size Violation
554 5.7.1 Message blocked due to spam content in the message
554 5.7.1 [P4] Message blocked due to spam content in the message.
554 5.7.1 <sender@yourdomain.com>: Relay access denied
554 5.7.9 Message not accepted for policy reasons. See http://postmaster.yahoo.com/errors/postmaster-28.html

554 RLY:B1
554 delivery error: dd This user doesn’t have a ymail.com account
554 Denied (Mode: normal)
554 Invalid recipient
554 Malformed mail denied!
554 Message is not RFC compliant; missing “Date” header
554 Message not allowed – [PH01] Email not accepted for policy reasons. Please visit http://postmaster.yahoo.com/errors/postmaster-27.html [120]
554 Message permanently rejected
554 Message refused
554 no valid recipients, bye
554 rejected due to spam content
554 rejected due to virus
554 <sender@yourdomain.com>: Relay access denied
554 Sorry, no mailbox here by that name.
554 Spam detected
554 Spam violation, the content of your e-mail contains illegal characters, re-sent after examination
554 Transaction Failed Spam Message not queued.554 Virus found, message permanently rejected (#5.3.0)

Create a new Email Address

Navigate to the Mail section inside the Control Panel.
Click the Email Accounts icon.

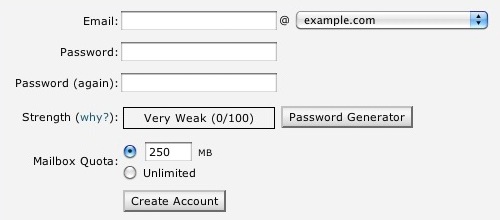
This will display the page where the email address can be setup.

Enter the email address you desire.
Enter a secure password & type it again.
Click the Create button.
Your email address has been setup. You should see a display similiar to this:

Creating an email account in Mail (Mac Mail)
If you are using a Mac, you can manage your mail through the Mac based email application Mail; this application is also known as “Mac Mail”.
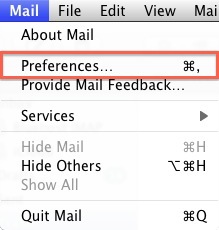
Select the ‘Mail’ menu.

Select Preferences.

Click on the Accounts tab.

On the Accounts window, click the + sign.

You will be presented with the Add Account Wizard.

Please enter your name, as you want it to appear on your outbound E-mail messages.

Please type your E-mail address.

Enter your E-mail password.

Click the Next button.
Now, you will see this screen.

Please choose your account type. You may select either POP or IMAP. Click here for an explanation on the differences between POP3 and IMAP.

Give this account a description for quick reference.

Please enter mail. followed by your domain name as the Incoming and Outgoing mail server.
Enter your E-mail password.

Click Next.
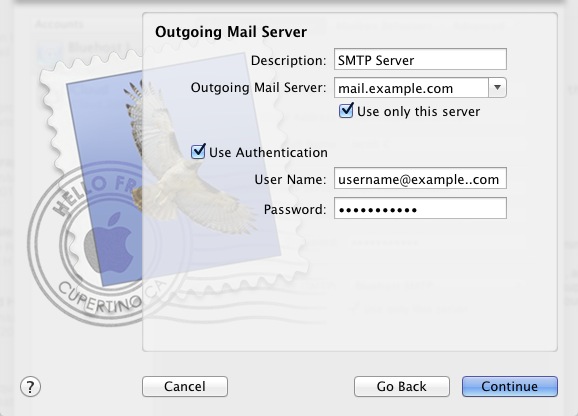
Now you will see a screen asking for the Outgoing Server information.

Please give your Outgoing Mail Server a description.

The Outgoing Mail Server is the same as your incoming mail server. Again, this will be something like mail.example.com

Be sure that the Use Authentication box is checked.

Enter your E-mail address for the User Name.

Please type in your E-mail password.

Click the Next button.
You will be presented with a confirmation screen with your settings. If everything is correct, press the Create button.

Email setup on the iPhone or iPod Touch

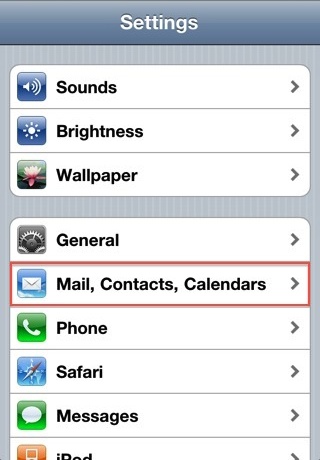
Tap Settings
Tap Mail, Contacts, Calendars

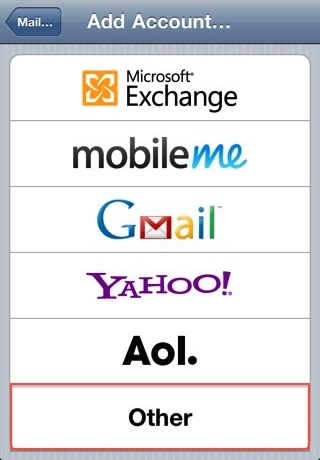
Add Mail Account

Choose Other

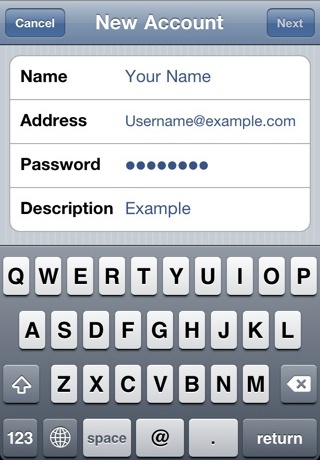
New Account Information

Enter your Name
Enter your email address as the Address
Enter the password for your email address
Tap Next

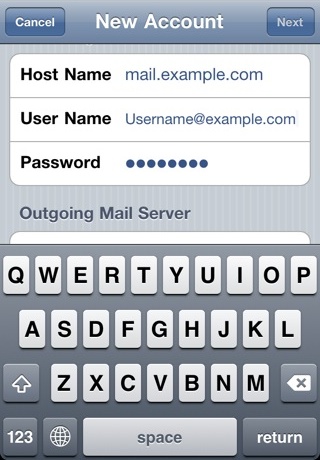
Host Name: This is typically your domain name preceded by “mail.”. This can be found in the E-mail Accounts section of the cPanel, under More > Configure Mail Client.
User Name: Your email address.
Password: The password for your email address.
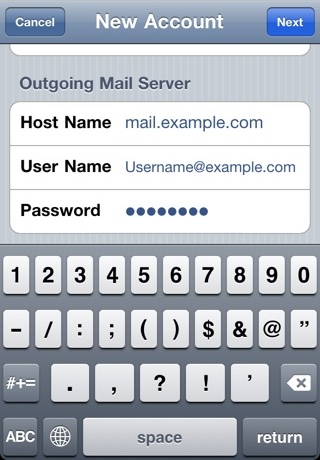
Outgoing Mail Server

Host Name: This is the same as the incoming server.
User Name: This is required and again is your email address.
Password: The password for your email address.
Tap Next.
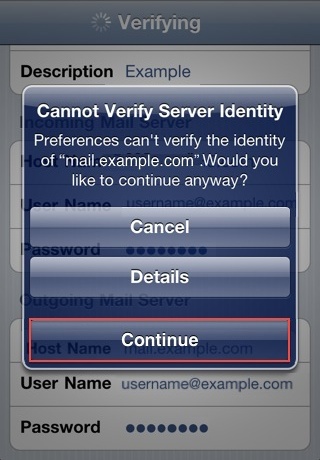
Cannot Verify Server Identity
This error message it is due to the SSL certificate being used for the mail server is *.BlueHost.com. To use the SSL Certificate simply click Continue.

How to store Sent, Drafts and Trash on the server
To do this please go to Settings > Mail, Contacts, Calendars
Choose your email account
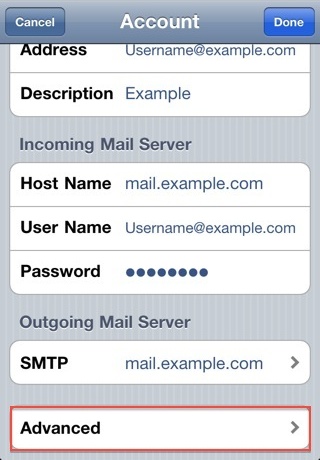
Tap Advanced

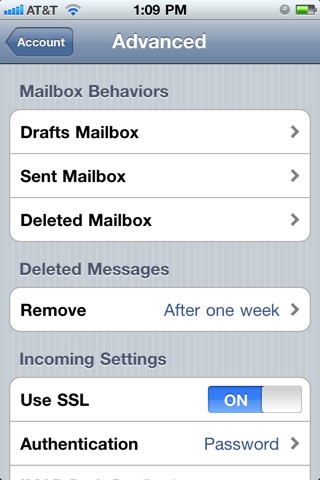
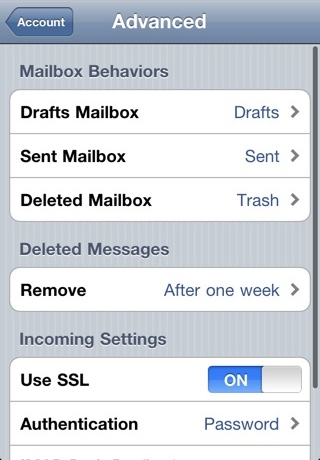
Under Mailbox Behaviors choose the mailbox you wish to configure.

Choose the corresponding folder on the server you wish to save the email in.

Repeat the above steps for any other folders you wish to store on the server.

How to Setup Outlook 2010

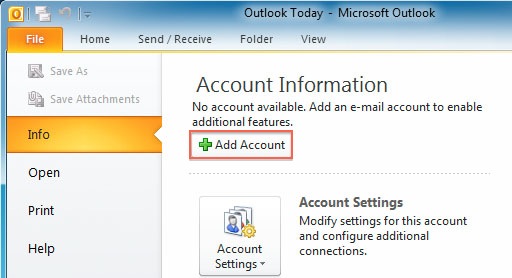
Select the ‘File’ menu.

Select Info.

Click the “Add Account” button.

Choose to “Manually configure server settings” .

Click Next.
Choose “Internet E-Mail” .

Click Next.

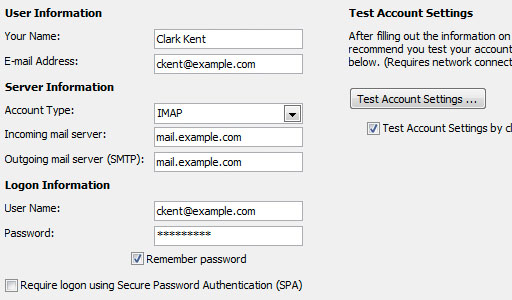
Account Settings:

Please enter your name, as you want it to appear on your outbound E-mail messages.

Please type your E-mail address.

Enter your E-mail address for the User Name.

Enter your E-mail password.

Please enter your mail server. This can be found in the E-mail Accounts section of the cPanel under Configure Mail Client.

The Outgoing Mail Server is the same as your incoming mail server.

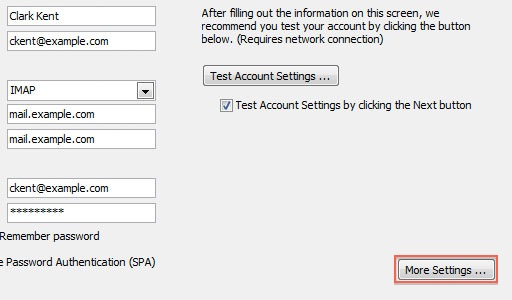
More Settings
Click the More Settings button.

Click the Outgoing Server tab.

Click the “My outgoing server (SMTP) requires authentication” checkbox.

Make sure that it is using the same settings as your incoming mail server.

Click the Advanced tab.

If you are using POP3 with SSL, please click the checkbox and select 995 for your port. Otherwise leave the port at 110.

If you are using POP3, you may choose when messages are removed from the server.

If you are using IMAP with SSL, please click the checkbox and select 993 for your port. Otherwise leave the port at 143.

If you are using SMTP with SSL, please click the checkbox and select 465 for your port. Otherwise change the port to 26.

Click the OK button.

Testing Settings

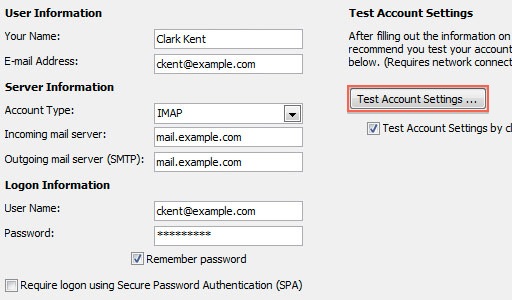
While on the E-mail Accounts screen, click the Test Account Settings button.

This will both check your settings and send a test E-mail to yourself to confirm that everything is working. If you receive any errors, please check your configuration.

Click the Close button on the Test Account Settings window.

Click Next on the E-mail Accounts window.

Click the Finish button.
You should now be able to send and receive mail.

How to access your email with Gmail

Incoming Mail (POP3)

Login to your Gmail Account.
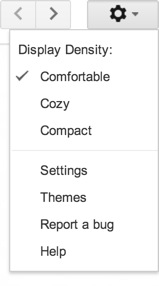
Choose Settings, from the Settings cog.

Click Accounts and Import.
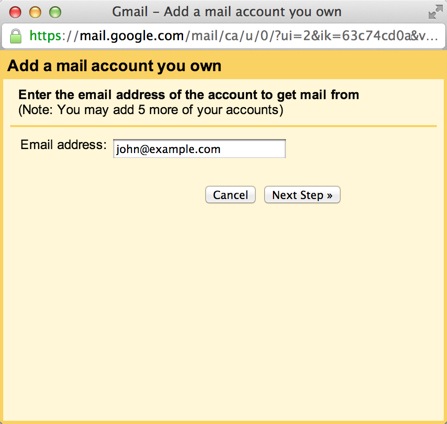
Click ‘Add a POP3 mail account you own“.
Enter your Email address.

Click the Next button.
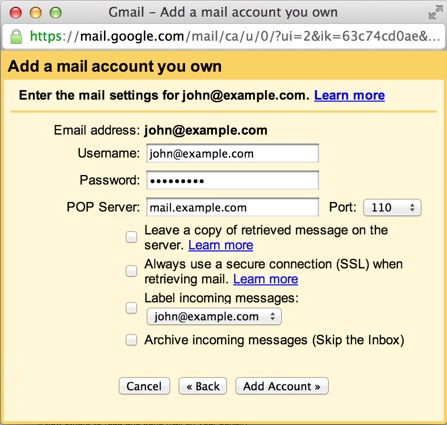
Enter your full email address as the Username.
Enter Password for your email account.

Enter the POP Server. This will be your domain name proceeded by “mail.”
Choose any additional options you may want
Click the Add Account button.

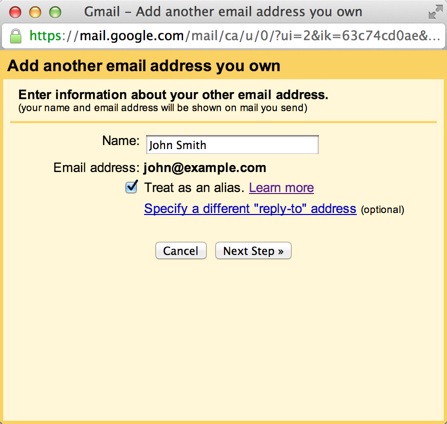
Outgoing Mail (SMTP)

Choose ” Yes, I want to be able to send mail as john@example.com”

Click the Add account button.
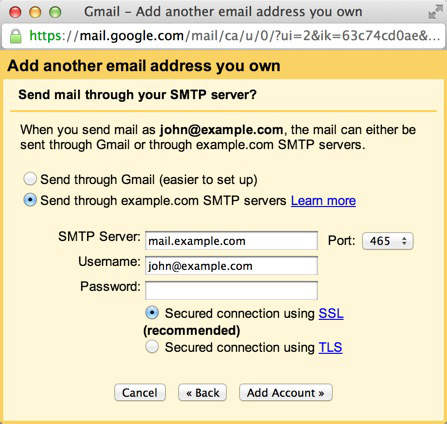
Choose to send “Send through example.com SMTP server”
Enter the SMTP Server. This will be your domain name procded by “mail.”
Enter your full email address as the Username.
Enter Password for your email account.
Choose Port 25 (Non SSL) or 465 (SSL).